
How to promote pipelines across environments
Learn how to change the deployment environment of a pipeline.
Step 1: Select the desired pipeline
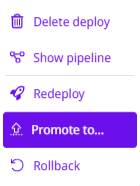
Step 2: Promote the pipeline

Step 3: Check the current situation of the pipeline
Last updated
Was this helpful?